* It may have a CDROM or DVD icon beside it to help identify it as the setup program.
* Windows might prompt you to Cancel or Allow the program. Choose Allow.
At this point you should see the following screen appear on your computer monitor.

Click on the first option, KX DRIVER - Forget the Universal Driver !
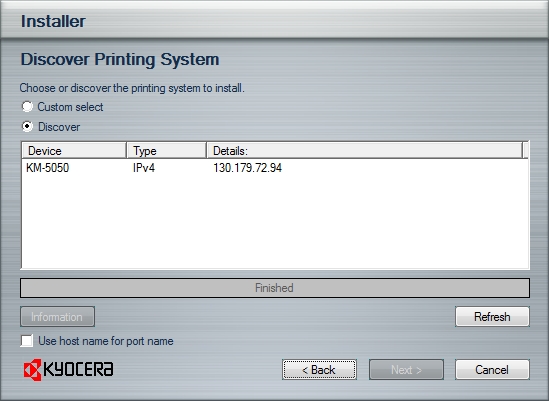
IF you do not see any printer listed, do not panic. Very likely you are behind a firewall then, and you will have to manually enter the details. IF this is the case, then select the Custom Select option, click on the Next button, and follow the screen below. Otherwise, highlight the discovered printer, click on the Next button, and skip ahead to Step 5 to continue.

Select the Kyocera KM-5050 option, click on the Next button, and follow the screen below.

With Standard TCP/IP Port selected, click on the Add Port button, and follow the screen below.
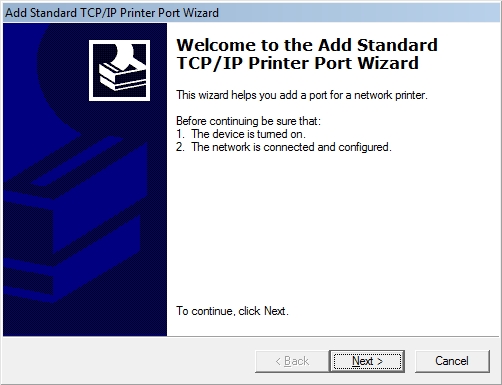
Just click on the Next button, and follow the screen below.
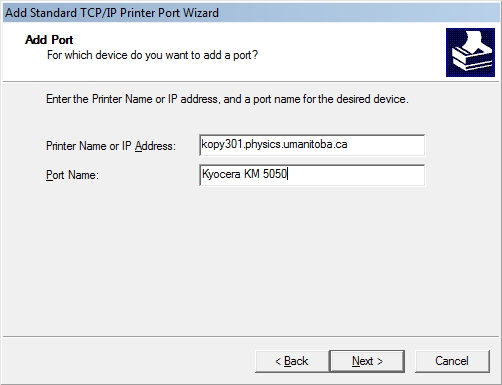
Fill in the details as you see in the screen shot above, click on the Next button, and follow the screen below.
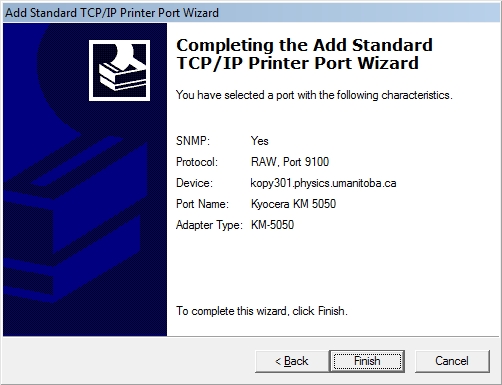
Now click on the Finish button, and follow the screen below.
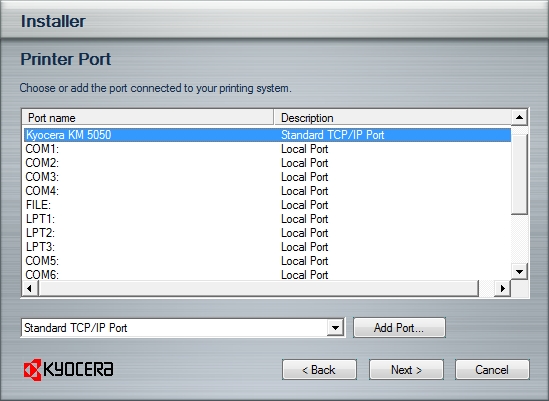
With Kyocera KM 5050 and Standard TCP/IP Port selected, click on the Next button, and now we are ready to continue with Step 5 (next).
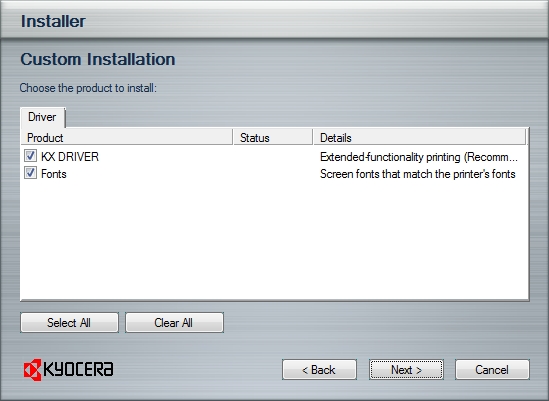
Just click on the Next button, and follow the screen below.
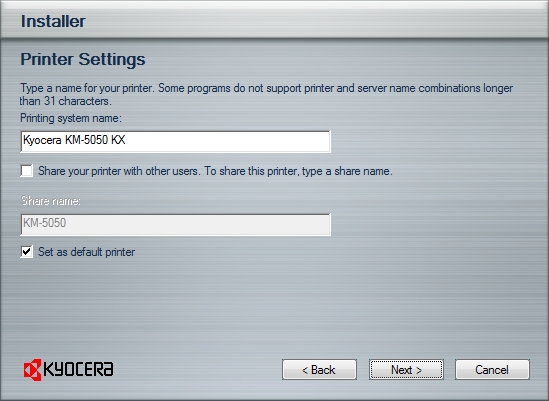
* IF you don't want this to be your default printer, then make sure to uncheck that option.
Now click on the Next button, and follow the screen below.
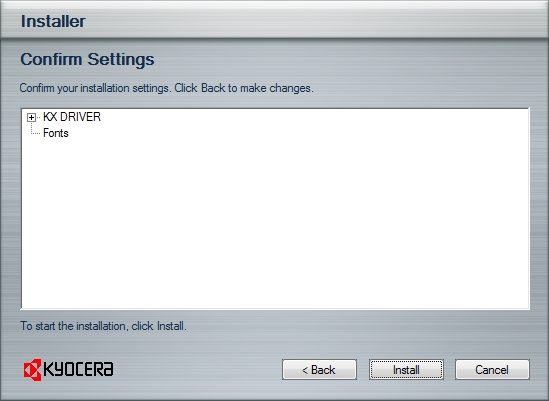
Click on the Install button, you should something like the following screen. Give it a few minutes to finish.

During this process, you will see the following screen come up
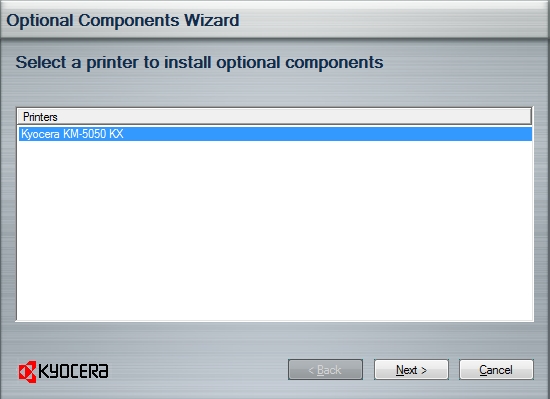
Make sure the printer is highlighted, click on the Next button, and follow the screen below.
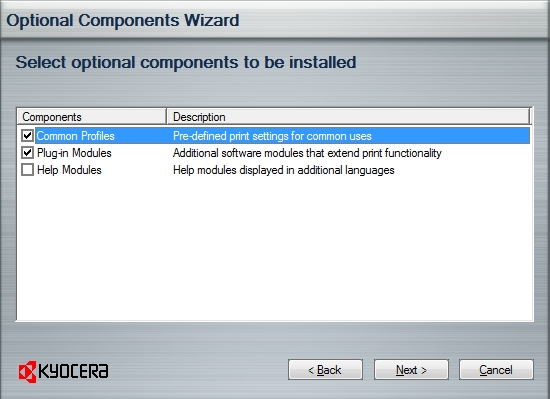
Check the first two options as shown in the screen above, click on the Next button, and follow the screen below.
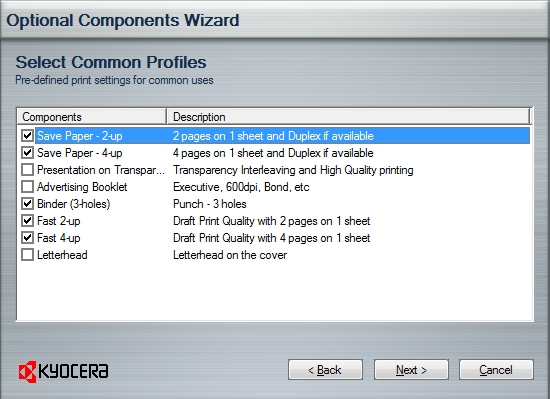
Check the options you want, the ones shown above are the more popular ones, then click on the Next button, and follow the screen below.
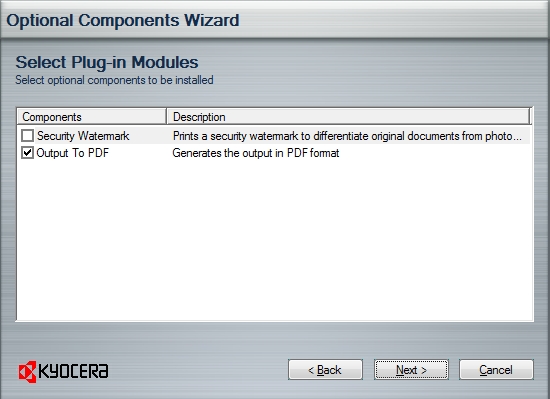
Just click on the Next button, and follow the screen below to confirm your settings.
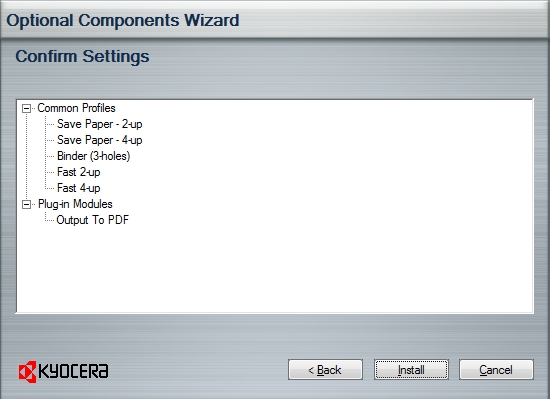
If you're happy with your choices, click on the Install button to finish this up, otherwise click on the Back button what ever number of times you need to make the necessary changes to your configuration. Use the earlier screen shots to guide you along. After this install stage, you will see the screen below.
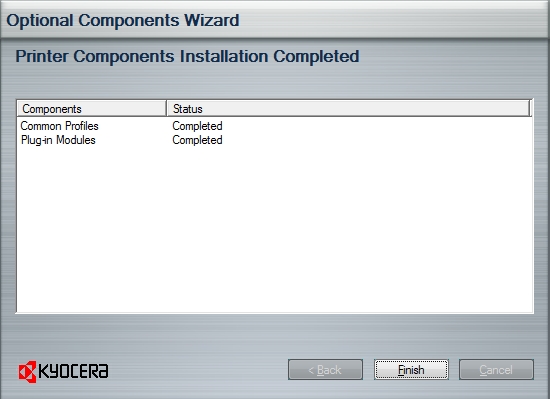
Click on the Finish button, and follow this very last screen below.

Uncheck the Print a test page option, then click on the Finish button. The reason you need to uncheck that option is because we first need to configure job accounting. This completes the driver installation.
The printer will not print if you do not configure job accounting. Each time you print you will be prompted for your scanner/copier ID - if you don't have one, please ask the main department office staff to give you one. You will not be able to print with out it. Also note, the Kyocera print tracks pages printed per user (ID). Go to the Start menu, then Control Panel, then Printers. Now right click on the Kyocera KM-5050 KX printer, choose Properties, at which point you should see a screen similar to the following.
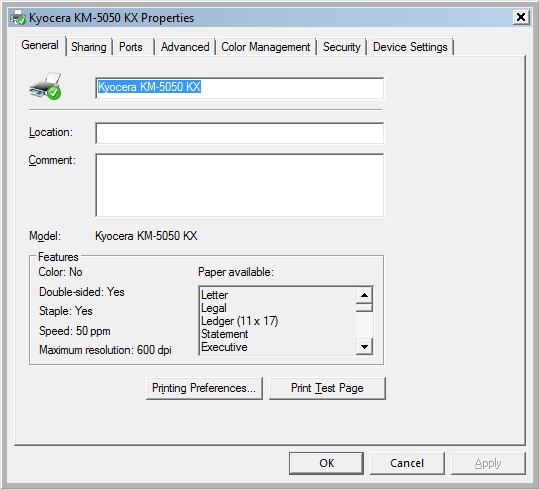
Click on the Device Settings tab, and follow the screen below.

Click on the Administrator button, and follow the screen below.
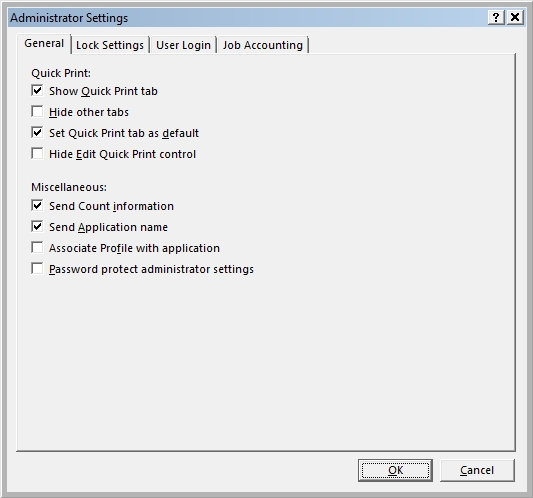
Click on the Job Accounting tab, which will show a screen similar to the following.
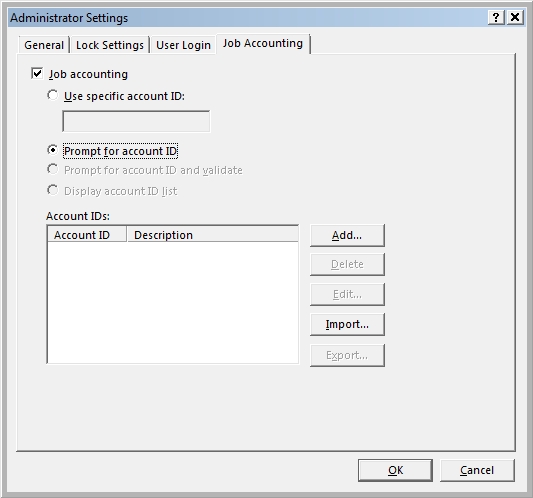
Check the Job accounting and Prompt for account ID boxes, then click on the OK button.
You should now be back at the Device Settings (tab) screen again. Click on the button labeled Auto Configure... and follow the screen below.
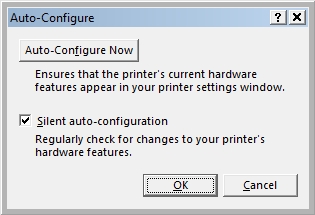
Click on the OK button, which will again take you back to the Device Settings (tab) screen.
At that point just click on the OK button, and the printer is ready for use.